
The 18 Best Back Exercises for Width, Thickness, and Strength
Back day can be one of the most enjoyable days you’ll have in the gym. Due to the sheer number of muscles in the back, it’s one of the strongest parts of the body — second only to the legs. Also, a well-developed back signals to the world that you have put in some serious effort at the gym.
There are countless exercises you can perform to build size and strength in the back. When you train the right exercises the right way, you will build your ability to move significant amounts of weight, better protect your spine, and all-around improve your performance in everyday life. Here are 18 of the best back exercises to construct your workouts around.
Best Back Exercises
- Deadlift
- Pull-Up
- Inverted Row
- Suspension Row
- Bent-Over Barbell Row
- Single-Arm Dumbbell Row
- Wide-Grip Pulldown
- Neutral-Grip Pulldown
- Single-Arm Kneeling Pulldown
- Lat-Focused Seated Cable Row
- Chest-Supported Dumbbell Row
- Chest-Supported Machine Row
- Landmine Row
- Meadows Row
- Cable Upper Trap Shrug
- Cable Rope Pullover
- Face Pull
- Farmer’s Walk
Deadlift
The deadlift — a noble member of the “Big Three” powerlifts — is best known for its ability to add size and strength to the back and leg musculature. Although it doesn’t directly work the back muscles through a long range of motion, it places a significant amount of tension across the back and entire torso, making it a unique and effective exercise for building mass.
Deadlift technique is straightforward, but it’s a skill-based exercise that takes some understanding and practice to make it safe and effective within your training program.
How to Do the Deadlift
Stand in front of a loaded barbell with your feet shoulder-width apart with the bar just a few inches from your shins — aligned over the knot of your shoelaces. Drive your hips back and allow your knees to bend slightly as you tightly grip the barbell just outside of shoulder-width with a palms-down grip. Keep your back and torso rigid and your arms straight. Push your legs into the floor as you simultaneously pull your chest and shoulders upwards to lift the bar as you stand up into a fully upright position.
Benefits of the Deadlift
- It works multiple muscles in your back, plus your glutes, hamstrings, and grip strength.
- When performed consistently, your strength can progress substantially, especially as your form improves.
- It’s an exercise that can be performed in many different rep ranges, allowing you to build muscle and strength across the upper and lower body.
Pull-Up
The pull-up provides a potent stimulus to the muscles across the upper body with little need for specialized equipment to get the job done. All you need is any bar that can support your body weight.
If you really want to get a lot out of the movement, control the eccentric (lowering) portion of the lift and focus on keeping your torso rigid throughout the entire range of motion.
How to Do the Pull-Up
Take a pronated (overhand) grip on the bar, slightly wider than shoulder-width. With your body hanging from the bar, ensure your core is engaged to keep rigidity in your torso while minimizing swinging.
To initiate the movement, contract the muscles of the upper and mid-back. Aim to bring your chin up to or above bar level. Drive your elbows down toward your pockets. If you’re on the heavier side or a beginner new to the lift, perform more sets with fewer reps as you build up your strength.
Benefits of the Pull-Up
- You can perform this exercise anywhere there is a pull-up bar, which can be in your doorway at home, in the park, or a fully equipped gym.
- Learning to control and manage your body weight is a great way to build up joint stability as you get stronger.
- You can work the muscles of your back and arms through a long range of motion while also challenging the muscles of your core.
Inverted Row
The inverted row can be an effective bodyweight exercise, particularly for beginners, because you aren’t required to lift your entire body weight. This makes it an effective choice to increase strength on the way to performing a pull-up.
The exercise is also extremely useful when training at home since it requires only a solid bar and a sturdy surface for support. This way, a bodyweight-only workout isn’t limited to only pull-ups to work your back.
How to Do the Inverted Row
Place a bar in a stable rack. Adjust the height of the bar so you can just reach it when lying on the ground. Lie under the bar and grab the bar with an overhand grip. With your arms locked, your body should be in a rigid plank position with a straight line from your neck to your heels.
Lift yourself by pulling your elbows toward the ground while driving your chest toward the bar. Control your body weight back down to the starting position.
Benefits of the Inverted Row
- The inverted row is great for beginners and intermediate lifters aiming to build overall strength and muscle in the upper and mid-back.
- This can be used as a progression to get you closer to performing your first bodyweight pull-up.
Suspension Row
The suspension row is another effective bodyweight movement that progresses the inverted row to another level. By quickly adjusting your stance and body position, you can immediately alter leverage to make the exercise more or less challenging as needed.
This is a great exercise for developing overall strength and body control while allowing for a less restricted arm path. This helps to prevent discomfort in the wrists, elbows, and shoulders.
How to Do the Suspension Row
With your feet at shoulder width, grab the handles and lean back into position. Adjust your body angle as needed to set the difficulty. The more vertical your body, the easier the exercise will be.
With your feet on the ground and your body set in a rigid plank position, drive your elbows back and pull yourself toward the handles. Don’t allow your elbows to flare out to the sides and don’t allow your shoulders to collapse forwards.
Benefits of the Suspension Row
- This is another effective movement that allows the lifter to progress toward their first pull-up.
- The exercise difficulty can be quickly and easily adjusted by repositioning your stance and body angle.
- The suspension trainer allows for a less restrictive arm path compared to a traditional barbell, allowing you to better adapt the row to your individual structure and reduce joint strain.
Bent-Over Barbell Row
The bent-over row can add a lot of versatility to your training program. It can be performed with a traditional barbell, a hex bar, kettlebells, or dumbbells. For more efficient skill development, stick with one variation for at least several weeks before switching it up.
The basic barbell row allows you to build strength across the upper and lower body. The muscles of the posterior chain (lower back, glutes, and hamstrings) work to keep your lower body stable throughout the movement, while the muscles of your upper back, mid-back, and biceps help row the bar toward your stomach.
How to Do the Bent-Over Barbell Row
Set up as you would for the deadlift, standing with your feet hip-width apart in front of a loaded barbell. If you have exceptionally long legs, you may need to place the barbell onto blocks to allow for a more comfortable starting position. Hinge at the hips and allow your arms to hang down.
Tightly grab the bar just outside of shoulder-width with an overhand grip. Drive your elbows back and up as you focus on pulling the bar toward your upper abs, between your sternum and belly button.
Benefits of the Bent-Over Barbell Row
- You can effectively train the muscles of the upper, mid, and lower back, as well as the glutes and hamstrings.
- Simple variations can be performed with kettlebells, dumbbells, a hex bar, cables, or a traditional barbell.
- Due to the demands of this movement, you can build up functional strength throughout your core and low back, helping you prevent injuries in your everyday life.
Single-Arm Dumbbell Row
This single-arm row variation was one of the most popular among Golden Era bodybuilders like Arnold Schwarzenegger for building muscle size and strength across the entire back.
It can also help you build arm and grip strength, as well as work on muscular asymmetries that may have developed from past injuries or time away from the gym.
How to Do the Single-Arm Dumbbell Row
Stand behind the head of a high-angle incline bench. Lean over and place one hand firmly against the top of the bench with the same-side leg forward, positioned under your shoulder.
Reach your free hand down to grab a dumbbell by your feet. Keep your palm facing your body as you drive the weight back and up until your elbow is even with, or just past, your torso. Control the dumbbell back down to the stretched position.
Benefits of the Single-Arm Dumbbell Row
- By working the body unilaterally (one side at a time), you allow for more versatility with your program design, with the added ability to address any muscular imbalances.
- In addition to building up muscle size and strength across the back, you will also improve your grip, which can carry over to any other movement that requires holding a weight.
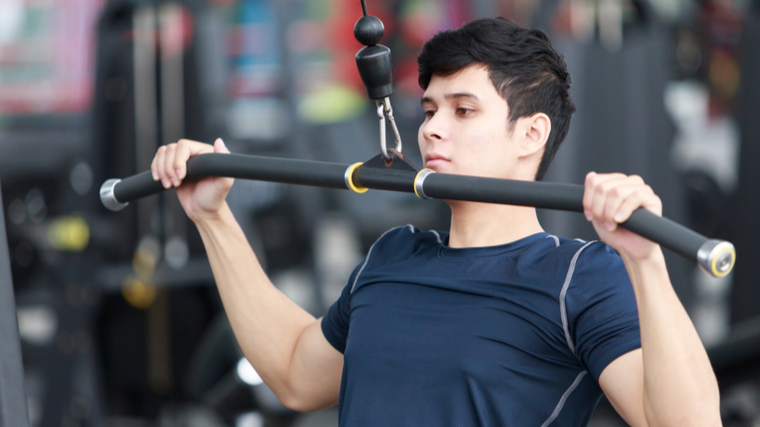
Wide-Grip Lat Pulldown
Aside from the fact that you’re sitting while performing this move, a lat pulldown is essentially the same movement pattern as a pull-up. This makes the pulldown one of the most effective weight training (non-bodyweight) exercises to work towards a pull-up.
The cable’s constant resistance helps create a more stable environment while improving time under tension, which can lead to increased muscle size.
How to Do the Wide-Grip Lat Pulldown
Grasp a long bar attachment slightly wider than shoulder-width, with a palms-down grip. Sit down and set your legs securely under the thigh pads. Keep your core tight and your torso upright while pulling the bar down toward your chest.
Think of pinching your shoulder blades together in the bottom position. Resist the weight as you slowly return to the starting position.
Benefits of the Wide-Grip Lat Pulldown
- The cable’s constant resistance helps create a more stable environment while improving time under tension.
- This is a great exercise to strengthen your back, arms, and grip if you are working up to your first pull-up because you can progressively add weight and build strength.
- The wide, pronated grip allows you to emphasize the muscles of your upper back.
Neutral-Grip Lat Pulldown
This pulldown variation has you pulling with a neutral-grip (palms facing each other). This adjustment allows you to place more focus on your lats and biceps compared to your upper back.
A neutral-grip gives your arms a stronger biomechanical advantage by recruiting more biceps into the pulling motion, while the elbow position activates more back muscles. This allows you to move heavier weights more safely compared to other pulldown grips.
How to Do the Neutral-Grip Lat Pulldown
Grab a neutral-grip attachment (palms facing each other) and sit on the seat with your legs secured under the thigh pads. Keep your core tight and your torso upright while pulling the bar toward your chest.
Aim your elbows forward, not sideways, to ensure stress remains on the lats. Resist and control the motion back to the stretched position.
Benefits of the Neutral-Grip Lat Pulldown
- This exercise gives you a way to progressively work towards your first pull-up.
- The cable’s constant resistance helps create a more stable environment while improving time under tension.
- The neutral-grip puts you in a great position to bias the lats and biceps compared to the upper back, adding variety and customization to your back training.
Single-Arm Kneeling Lat Pulldown
This unilateral exercise can add variety to your back training. It works the lats through a long range of motion and challenges tissues the rear delts and teres major.
The kneeling position reduces lower back strain, encourages core stability, and ensures a long range of motion. This exercise is relatively advanced because it involves both upper and lower body positioning, so take time to nail down your setup and technique.
How to Do the Single-Arm Kneeling Lat Pulldown
Grab a single handle attached to a high cable pulley. Step back with the opposite foot and kneel on the ground, keeping your front foot flat on the floor. Squeeze the handle and drive your elbow toward your hip.
Control the weight when returning to the starting position. Maintain a kneeling position as your arm, shoulder, and back are stretched before performing the next rep.
Benefits of the Single-Arm Kneeling Lat Pulldown
- This exercise builds back and core strength with minimal lower back strain.
- The cable’s constant resistance increases time under tension throughout the range of motion.
- The setup of the exercise can be adjusted to an individual’s structure, by changing the cable’s height and distance from the pulley.
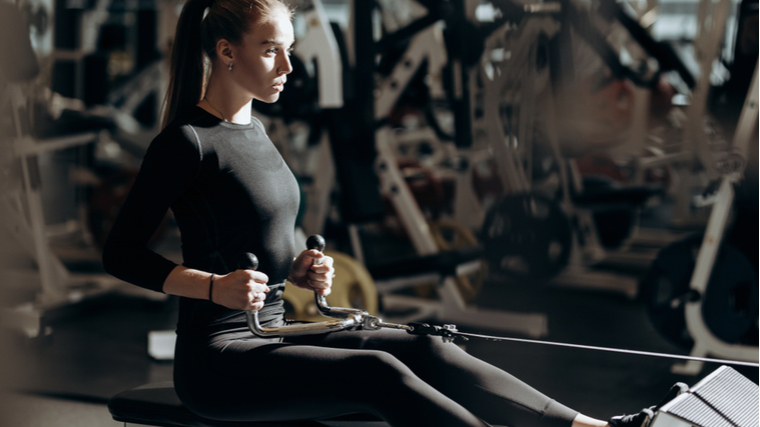
Lat-Focused Seated Cable Row
This seated row variation uses specific hand position, upper body position, and arm path to place a large amount of muscular tension on the lats.
By maintaining a slight forward lean and utilizing a neutral-grip, your body is in a better position to engage your lats during the movement and minimize the role of the upper back and traps.
How to Do the Lat-Focused Seated Cable Row
Sit in the cable row station with your feet on the platform and your hands grasping a wide attachment with a neutral-grip (palms facing one another). With your core tight and your torso position leaned slightly forward at the hip, pull toward the top of your abdomen.
Do not round your back. Control the weight as you return back to the starting position. In the stretched position, don’t allow the weight to pull you far forward out of a strong postural alignment.
Benefits of the Lat-Focused Seated Cable Row
- The cable’s constant resistance creates a more stable environment while improving time under tension throughout the range of motion.
- This variation is great for building size and strength in the mid-back.
- The neutral-grip allows you to emphasize the lats and biceps.
Chest-Supported Dumbbell Row
The supported position takes your low back out of the equation, giving you more stability to isolate the work to the muscles in your upper and mid-back.
This exercise can be performed with dumbbells or kettlebells in a prone position on an incline bench, or more horizontally in a cable station. Both will effectively place tension across your traps, rhomboids, rear delts, and lats, but may depend on your equipment availability.
How to Do the Chest-Supported Dumbbell Row
Lie face down on an incline bench set around 45-degrees. With a dumbbell in each hand, drive your chest into the bench while rowing the weight until your elbows are even with, or just past, your torso. Slowly lower the weight to a full stretch before repeating additional reps.
Benefits of the Chest-Supported Dumbbell Row
- The chest support takes stress off the lower back, increasing your ability to isolate muscles of the upper and mid-back.
- This movement encourages strict form and reduces the chance of momentum-based cheating.
- It’s easy to set up and only requires an adjustable bench and a pair of dumbbells or kettlebells.
Chest-Supported Machine Row
This machine-based variation has you pull the load toward your chest. Your general arm path will be similar to a seated row, which aligns the rowing motion with the muscles of the lats, rear delts, and upper back (traps, rhomboids, and teres major).
Your grip will have a significant impact on the muscles being biased during the exercise. A neutral-grip (palms facing each other) will focus more on the lats, while a semi-pronated grip (diagonally between palms facing down and facing each other) will focus more on the rear delts and upper back.
How to Do the Chest Supported Machine Row
Sit in the machine and grab the handles with your chest against the pad and your feet against the provided supports. With your chest pressed firmly into the pad, pull the handles toward you, extending your elbows behind your body. Control the weight as you return to the starting position.
Benefits of the Chest Supported Machine Row
- The machine provides a clear and consistent movement path, allowing you to focus more on the muscles working and less on maintaining a steady pulling position.
- The chest support and foot pads allow your entire body to brace more effectively, delivering more stability and allowing you to lift heavier loads.
- The multiple grip options allow for more individualization and control over what muscles are being emphasized.
Landmine Row
This bent-over barbell row variation is effective at placing tension across the traps, rhomboids, rear delts, and lats. This movement also recruits the posterior chain (glutes and hamstrings), low back, and abs for total-body stability.
The unique leverage moves the bar along a slightly angled path rather than completely vertical, which creates different muscular stress in the top position compared to dumbbell or barbell rowing movements.
How to Do the Landmine Row
Slide a barbell into a landmine attachment sleeve or wedge it into a corner of the wall. Stand over the barbell with one foot on each side, a few small steps behind the weight plates.
Position a landmine row attachment onto the front of the barbell and grasp the handles. If your gym doesn’t have a landmine row attachment, use a rope handle or V-bar attachment and place it around the bar just behind the weight plates.
Hinge at the hips and keep your legs bent. Maintain a tight core and a neutral spine. Pull your hands toward your waist. To increase the range of motion, load the bar with 10-pound or 25-pound plates instead of larger 45-pound plates.
Benefits of the Landmine Row
- This variation can be performed anywhere you have access to a barbell, whether locked in a landmine sleeve or wedged into a corner at your gym.
- It challenges multiple muscles of the back, glutes, hamstrings, and abs.
- Different stances and body postures can be used (such as a more upright torso or more horizontal torso) to add variety with an emphasis on different back muscles.
Meadows Row
This exercise, popularized by the late bodybuilding coach John Meadows, has become known for its ability to build up thickness in the back — specifically the rear delts and teres major.
This exercise is unique in that it’s unilateral and has the lifter standing perpendicular to the barbell positioned in a landmine setup. The landmine alters your leverage during the lift, which places unique stress on the muscles.
How to Do the Meadows Row
Assume a staggered stance with your front foot perpendicular to a barbell loaded into a landmine sleeve. Hinge at the hips and grip the bar with an overhand grip, using lifting straps to secure your grip on the bar. Rest the elbow of your non-working arm on your front thigh.
Row the weight up at an angle, so your hand ends up just outside your chest and your elbow is pulled back. Lower the weight into a full stretch. Load the bar with smaller 10-pound or 25-pound plates to ensure a long range of motion.
Benefits of the Meadows Row
- The exercise builds thickness in the upper back by emphasizing key muscles, including the rear delts and teres major.
- The staggered stance creates a need to resist rotation of the torso, adding a challenge to core strength and stability.
- Because of the very stable base and strap-assisted grip, much heavier weights can be used compared to a dumbbell row.
Cable Upper Trap Shrug
Shrugs are typically performed with free weights such as dumbbells or a barbell. However, the movement can be optimized with the cable pulley because the angle of resistance from low cables matches the fiber alignment of the upper traps — on diagonal angle rather than strictly vertical — which increases muscle activation.
High-tension from the cables also means a more effective workout with relatively less weight, making the movement less stressful on joints and more stressful on the target muscles.
How to Do the Cable Trap Shrug
Stand in the middle of two low-cable pulleys, with your knees slightly bent and your hands firmly grasping a single handle from each pulley.
Keep your core stationary as you shrug your shoulders up and in toward your ears. Don’t swing your torso or drive with your legs. Control the weight as you slowly return back to the starting position.
Benefits of the Cable Trap Shrug
- The cable resistance allows a longer time under tension, creating a greater stimulus for muscle growth.
- This variation lines up the resistance with the muscle fibers of the upper traps, maximizing muscular tension while minimizing stress around the shoulder joint.
- The exercise delivers significant muscular stress without extremely heavy weights, making it ideal for lifters with joint pain.
Cable Rope Pullover
The cable rope pullover, sometimes called a stiff-arm pulldown, is great for placing tension strictly on the lats. It avoids the arms-overhead stretched position required for dumbbell pullovers, making this a great alternative for lifters with upper back or shoulder mobility restrictions.
Using a longer rope or strap allows each arm to move in a more individualized arm path, which creates even less strain on the shoulder joints and more muscular stress on the lats.
How to Do the Cable Rope Pullover
Stand in front of a high-pulley cable station, holding a rope attachment with both hands. Lean slightly forward and keep a soft bend in your arms. Keep your torso rigid and abs tight while driving your upper arms down. Pull the attachment toward your hips as far as possible.
Control the weight as you return back to the starting position. Don’t allow your arms to bend when lifting or lowering the weight.
Benefits of the Cable Rope Pullover
- The peak contraction of the movement creates extremely high muscle activation in the lats.
- This exercise is one of the few ways to effectively isolate the lats without involvement from other back muscles.
- It provides a more effective resistance compared to the dumbbell pullover because the cable resistance is constant throughout the full range of motion while a dumbbell pullover delivers less resistance at the top of the movement.
Face Pull
To facilitate increased growth and strength of larger back muscles, your smaller muscles often act as synergists. They add strength and stability to the joints connected to those muscles, which allows them to function optimally and efficiently. The face pull is effective for training the upper back muscles around your shoulder blades, helping improve postural strength and control.
Unlike several exercises on this list, the face pull shouldn’t be used to break any strength records. Go light with higher reps. As you build up strength, you can start to slowly increase the weight, but moving heavy loads is not the best use of this exercise.
How to Do the Face Pull
Attach a rope handle to a high-cable pulley and adjust it to near eye-level. Grab the rope with your palms facing each other. Take a few steps back so there’s tension in the cable and extend your arms in front of your body.
Pull the rope toward your face and flare your elbows out and back. In the contracted position, your wrists should be close to your ears and your elbows should be in-line with your shoulders
Benefits of the Face Pull
- The face pull increases your scapular strength and stability, which is crucial for upper back bracing during movements like the deadlift as well as overhead pressing.
- It works the muscles between the shoulder blades such as the traps and rhomboids, while also building up strength in the rotator cuff muscles, improving overall shoulder joint health.
Farmer’s Walk
This loaded carry isn’t a strict “back exercise,” but it’s effective for placing tension across the muscles of the upper and lower body simultaneously. The postural muscles of the spine, as well as the upper back and traps, are challenged to a very high degree.
When performed consistently, it can build grip strength, core strength and stability, and improves postural strength and control. This exercise mimics many activities performed in your daily life, and can be performed by all ages and experience levels.
How to Do the Farmer’s Walk
Find a stretch of open space, as long as possible, and walk while carrying a pair of dumbbells, kettlebells, or even a trap bar. Keep your hands at your sides and your shoulder blades pulled down and back, not shrugged up. Remain upright and don’t allow your back to round forward as you fatigue.
When walking with load in your hand, the challenge becomes maintaining a steady, upright position. Focus on taking slow, controlled steps while moving a straight line with total-body stability. Don’t allow the weights to make you drift laterally.
Benefits of the Farmer’s Walk
- Can easily be performed anywhere you have open space and weights to hold onto.
- It builds grip and core strength, while also improving postural strength and control.
- It can be easily adapted to training for conditioning or fat loss by increasing the total duration or length of the walk.
The Back Muscles
The back is made up of a group of muscles that work together to achieve a wide range of movement patterns. As such, certain muscles will be biased more or less depending on the exercise being performed.
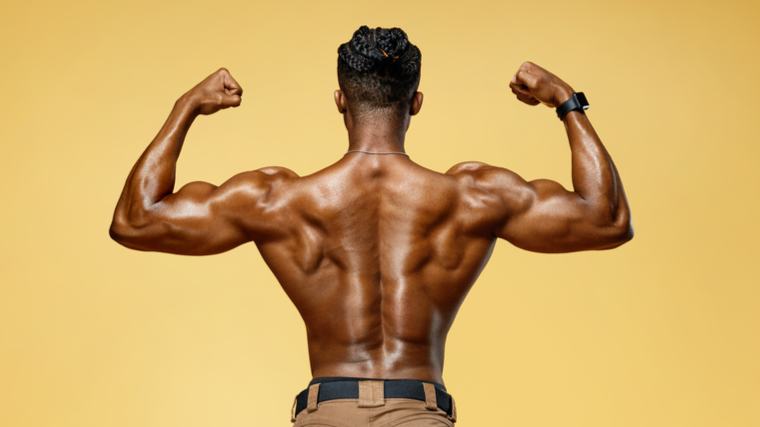
The primary muscles when it comes to training the back include the latissimus dorsi (lats), teres major, trapezius (traps), rhomboids, rear delts, and erector spinae (lower back).
When training your back, you will be using both muscles anatomically located more superficially (like the lats and traps), as well as deeper (like the rhomboids or erector spinae) within the back and torso. The back muscles have many different functions and are designed to work in synchronicity with one another, or as a unit.
Latissimus Dorsi
Commonly referred to as the lats, the latissimus dorsi are most widely known for their role in adducting the arm toward the body (bringing the upper arm towards the body’s midline), as well as medially rotating the arm around the back of the body (similar to “opening your chest” during a stretch).
During back movements, the lats play many roles — most notably helping stabilize the pelvis and interacting with the abdominal muscles in everything from respiration, maintaining shoulder positioning, to protecting the spine. (1)
Teres Major
The teres major attaches on the upper arm, next to the lat attachment, and stretches across to the lower part of the scapula. Sometimes referred to as the “little lat,” this muscle, along with the teres minor, are not technically part of the rotator cuff but share many roles with the muscles of the rotator cuff when it comes to glenohumeral (shoulder) stabilization.
The teres major also assists the latissimus dorsi in adducting the arm (bringing it closer to the body), as performed during a lat pulldown motion. (2)
Trapezius
The trapezius is a big muscle that spans across the better part of your upper and mid-back. This muscle has three divisions — upper, mid, and lower — and each plays an essential role in stabilizing the shoulder blades.
All three sections of the muscle are hard at work during pulling movements to help maintain tension and stability in the back. (3)
Rhomboids
The rhomboids are positioned directly below the traps in the middle of the back (between the shoulder blades). Both the major and minor divisions of this muscle retract, elevate, and rotate the scapula.
Weakness or loss of function of the rhomboids can be a significant contributing factor to a winged scapula (when the shoulder blades “point” away from the body), which makes it even more important to keep these muscles strong and working properly. (4)
Rear Delts
Also known as the posterior deltoid, the rear delts primary function is to bring the arm back around the body (shoulder extension), assisting the lats and teres major.
A flared arm position, with the elbows aimed out to the sides, makes the rear delts a primary mover during an exercise. This type of movement is how the muscle plays a big part in your back strength and development. (5)
Erector Spinae
These muscles, also known as the spinal erectors, are positioned deep within the torso and are responsible for controlling the axial skeleton — which includes the skull, vertebral column, and ribs. The spinal erectors primarily control flexion/extension, side bending, and rotation of the spine.
The lower back, in particular, is critical for stabilizing the pelvis and spine during movements such as the deadlift or many bent-over movements previously explained. (6)
How Often Should You Train the Back
To optimize muscle growth, train your back two to three times per week, depending on how many total days per week you’re training. Since the back is filled with different muscle groups, all with different fiber alignments and jobs, it’s important to train the back using many different exercises and rep ranges.
Depending on your training split, each workout may include a different amount of training volume. Anywhere from 10 to 16 total sets per week is a great starting point. Advanced lifters could potentially exceed 18 to 20 sets per week, especially if their goal is to emphasize a specific part of the back over another.
To achieve this total volume, choose three to four exercises and divide the sets up evenly across your training week. It’s generally a good idea to have a balanced ratio of vertical pulls (pulldown or pull-up variations) and horizontal pulls (rowing variations) to ensure balanced development across the entire back.
How to Progress Your Back Training
Since the back can be trained with a wide variety of exercises, it’s possible to steadily add weight to each specific exercise every week. As little as two-and-a-half to five pounds per week can be a sufficient increase to stimulate growth when the sets are taken near failure.
For multi-joint (compound) exercises like the barbell row or deadlift, you can add slightly more weight more quickly compared to an isolation-based exercise like dumbbell pullover or cable rope pullover.
If you find any exercises require more time to improve your technique, be sure to perform those movements towards the beginning of your workouts to avoid training them when fatigued.
If you’re new to lifting in general, simply improving your technique in an exercise can lead to gains in strength and muscle size across a few months’ timespan. Keep in mind that whenever you add a new exercise into your routine, it will take your body a few weeks to get used to the new challenge and nail down the technique.
How to Warm-Up Your Back
One of the most effective ways to warm-up for any muscle group is going to be with the exercises you are performing in that day’s training session. For example, if you’re performing chest-supported rows, you can warm-up by performing reps with light weight and raise the intensity (load lifted) as you proceed toward your working sets.
This ensures that the appropriate muscles and joints are being primed, reducing the risk of injury and improving your overall training performance.
If you need additional time to warm-up, include exercises that work the muscles surrounding the joints you’ll be working in that session. For a back workout, that would include the elbow and shoulder joints.
Building a Complete Back
Designing a back workout doesn’t need to be an arduous process. To be effective, choose three to four exercises that train multiple muscle groups and progress them over time with varying rep ranges. Be sure to train the back both horizontally (with rows) and vertically (with pulldowns) for complete development. This detailed list gives you plenty of options to choose from, ensuring a bigger, stronger back in the long-term.
References
- Jeno SH, Varacallo M. Anatomy, Back, Latissimus Dorsi. [Updated 2020 Aug 13]. In: StatPearls [Internet]. Treasure Island (FL): StatPearls Publishing; 2021.
- Barra-López, M. E., López-de-Celis, C., Pérez-Bellmunt, A., Puyalto-de-Pablo, P., Sánchez-Fernández, J. J., & Lucha-López, M. O. (2020). The supporting role of the teres major muscle, an additional component in glenohumeral stability? An anatomical and radiological study. Medical hypotheses, 141, 109728.
- Ourieff J, Scheckel B, Agarwal A. Anatomy, Back, Trapezius. [Updated 2020 Aug 22]. In: StatPearls [Internet]. Treasure Island (FL): StatPearls Publishing; 2021.
- Farrell C, Kiel J. Anatomy, Back, Rhomboid Muscles. [Updated 2020 Jul 27]. In: StatPearls [Internet]. Treasure Island (FL): StatPearls Publishing; 2021.
- Elzanie A, Varacallo M. Anatomy, Shoulder and Upper Limb, Deltoid Muscle. [Updated 2020 Aug 22]. In: StatPearls [Internet]. Treasure Island (FL): StatPearls Publishing; 2021.
- Modes RJ, Lafci Fahrioglu S. Anatomy, Back. [Updated 2021 Mar 27]. Treasure Island (FL): StatPearls Publishing; 2021.
Featured Image: MR.SOMKIAT BOONSING / Shutterstock
The post The 18 Best Back Exercises for Width, Thickness, and Strength appeared first on Breaking Muscle.
—————
TRANSCOM ISP – Free Sigma HSE Email
Level 6 Domain Names are FREE – Register Now.